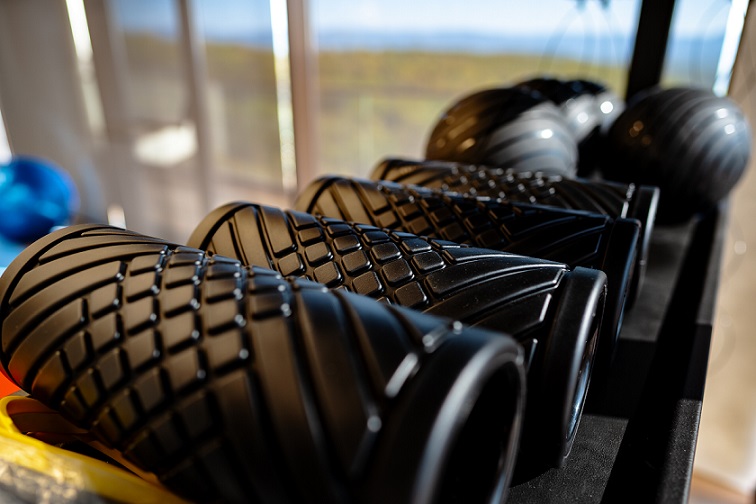
How To Use A Foam Roller:
In a previous post we discussed what muscle rollers are. Additionally, we discussed some of the benefits that research has suggested about these seemingly simple devices. In this post we’ll elaborate on just how to use a foam roller.
Learning what muscle rollers are, and the basic concept behind them is the easy part, right! However, it’s not just about that.
It’s taking the basic principles of foam rollers, and applying them to your own practice.
Moreover, you’ll most likely come under the influence of someone using them incorrectly for there actual purpose.
In this post, we’ll expand on how to use muscle rollers. Additionally, we’ll discuss some of the best times to foam roll as well. Lastly, we’ll detail problematic areas of the body many target with their rollers. Specifically, areas of the back, glutes, calves, and legs.
Best Times To Use Foam Rollers:
It’s safe to say many people are at least familiar with, or have heard about muscle rollers, at some point. However, knowing when the best times to use them, is another discussion.
According to apps like MyFitnessPal, some roll prior to a workout, while others roll afterwards. Oftentimes, you’ll find individuals swearing that foam rolling tight muscles before bed is the best, while others disagree.
An article published by REI, talks about how for “general soreness” foam rollers can be used just about any time. Remember, if you’re doing this correctly, rolling may be slightly uncomfortable, not necessarily painful.
In a previous posts, we detailed that muscle rollers are great for areas of the body frequently worked out. Furthermore, for targeting possibly overused muscles. One’s of which that have developed knots, also known as trigger points.
Why The Differing Arguments:
The differing of opinions may just lye in the fact that both sides make reasonable points.
Rolling prior to a workout may help to improve blood flow to the area of the body you’re about to work. Along with stretching this may just be a healthy way to increase both flexibility and mobility, prior to your workout. With more flexibility in a muscle, could this also help prevent injury? Probably so.

Whereas, rolling afterwards, may help nutrient rich oxygen continue to be driven to the targeting muscles. Oftentimes, people will tell you it also “just feels good” after an intense workout.
Furthermore, rolling is also suggestive to help clear or flush out toxins from the body, thus accelerating recovery. This according to an article published on Runner’s World.
Sometimes as much as you research, the answer actually lies in doing the foam rolling for yourself.
- What works best for you?
- Where do you see the benefits the most?
- Do you have the time to experiment with rolling both pre and post workouts, daily?
- Does it work best on your “rest day”?
Tips – How To Foam Roll For Beginners:
Tip 1:
Firstly, when using a foam roller, it’s okay to roll to a point of “good” pain or slightly uncomfortable, but not “bad” pain. Meaning, if you cross over into the realm of “ouch that really hurts”, you are rolling to hard.
Tip 2:
Start slightly away from the targeted area of discomfort/tightness and ease your way into the target area.
Tip 3:
Slow roll. This is not a race to see how fast you can roll your muscle. The process should be “massage-like”, helping you break down or slowly release the knot (or trigger point(s).
Tip 4:
Pay attention to the size of your foam roller in conjunction to the muscle group your working. However, with some manipulation you can make larger rollers work for smaller muscle groups.
It’s always advisable to touch base with a physical therapist or personal trainer for usage related to your body.
Tip 5:
Yoga mats work great!
Make this process as comfortable as possible. Grab a yoga mat and see how a foam roller can benefit your practice.
The General Idea On How To Use A Foam Roller:
Step One:
Know your target area. Some people have more problematic areas then others, which may take more effort. Understand your body.
Step Two:
Gradually make your way down to the roller so that your target area is just off center with the roller.
Step Three:
Start to allow some of your weight onto the roller. You may still feel slight discomfort being just off center with your pressure point area.
Step Four:
Start to slowly roll, you should still be off center of your main target area. Hence, you will ease your way into/onto the target spot.
Step Five:
Ease onto the main target area and hold for 10-20 seconds, you will feel pressure, but it should not be “bad” pain.
Step Six:
Now that the muscles around your target spot are warmed up, and you have some blood flowing, you have landed on your target area.
Slowly start to roll that area. You may have to adjust your weight distribution to stay at the “good” pain, and that’s okay.
Step Seven:
Gradually increase your time rolling and distance over your target area, until muscles become loosened.
Common Trouble Spots with Exercises:
Iliotibial (IT) exercise
For this exercise you will be positioned on your side. Lie down with your quad on the side in which you want to work on the foam roller.
Your other leg should be positioned in front of that leg with your foot firmly on the floor. This will help the lower half of your body stay off the ground, with additional help from the foam roller under the other quad.
You will now support your upper body with your hands. When you start to roll, roll from above the knee to your hip bone.
The foam roller should be positioned along the outer portion of your quad or upper thigh as you roll. You can take some slack (if need be) off of you upper leg at first, by leaning slightly forward using your upper body for leverage.
Quadriceps Exercise
Some prefer to roll both quads at the same time. For some this helps massage and relax there muscles more effectively.
Lie-down so that the foam roller is underneath both thighs, directly on the quads.
Use your hands or forearms to brace the upper body so you can roll back and forth, on the foam roller. Maintain this roll for roughly 1 minute or as tolerated.
Concentrate on rolling from your upper knee to just below your hip bone.
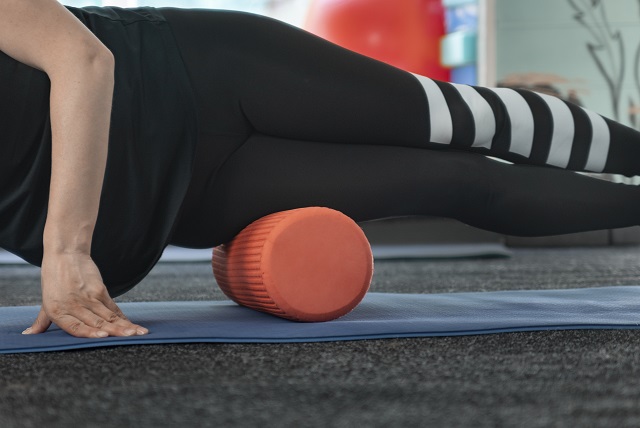
Calves Exercise
A fan favorite for sure, foam rolling your calves.
Sit down on your mat. Then, extend one of your legs forward over the foam roller. The other leg should be positioned with your knee bent, and foot firmly on the mat or crossed over your other leg.
Your hands will be positioned behind you to the side. Now, prop yourself, so that your gluts are off of the ground. As you are doing these exercises and rolling, make sure you are focusing on your tight areas.
Make that connection with your body. Don’t just go through the motions.
Slow down as you roll over the knots/trigger spots. Roll each leg for 1 minute. With calves, make sure your hands are positioned for support. Roll from your ankle to just behind the knee area or slightly below.
Positioning is crucial to foam rolling correctly, practice your form.
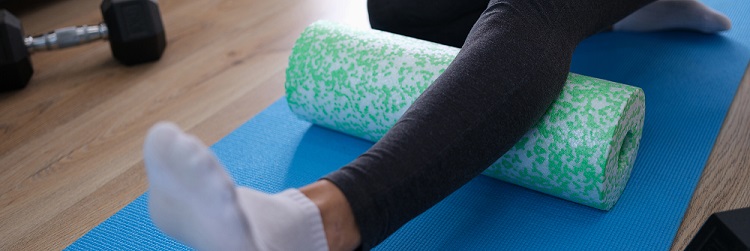
Hamstring Exercise
Foam rolling the hamstring is similar to the calves as far as positioning is concerned. Start by siting on the mat with one leg extended over-top the foam roller. The foam roller should be up behind your upper leg (or hamstring).
Pay attention once again to hand positioning. Furthermore, your hands should be supporting your body to properly roll the entirety of your hamstring. Roll from the bend in the knee, to the lower portion of your gluts.
Spend roughly 1 minute per exercise depending on severity of stiffness/workout.
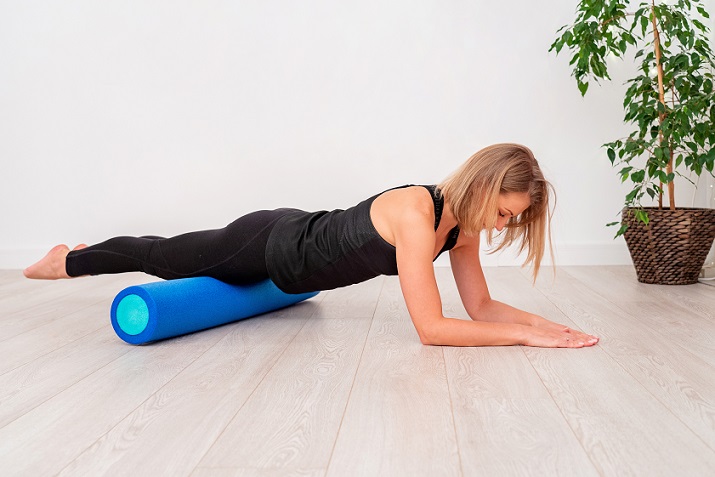
Upper Back
This foam rolling exercise requires you to lie on our back, with the foam roller at the shoulder blades.
Start with your butt on the floor and then slowly lift, placing your hands gently behind your neck. Similarly, as if you were doing crunches.
Knees bent and your legs should be propelling you back and forth as you roll.
Then, slowly start to roll. Above all, focus on rolling from the lower neck to mid-back.
Final Thoughts!
There you go, you can now be on your way to foam rolling!
We hope this has given you at least a starting point for foam rolling. There are a lot of exercises your can do with muscle rollers. With handheld rollers, makes it possible to even fit in a gym bag.
We hope you have a great day, and be sure to share this post on your social media.
References:
- https://blog.myfitnesspal.com/when-is-the-best-time-to-foam-roll/
- https://www.rei.com/learn/expert-advice/foam-roller-exercises.html
- https://www.runnersworld.com/health-injuries/a20812623/how-to-use-a-foam-roller-0/
