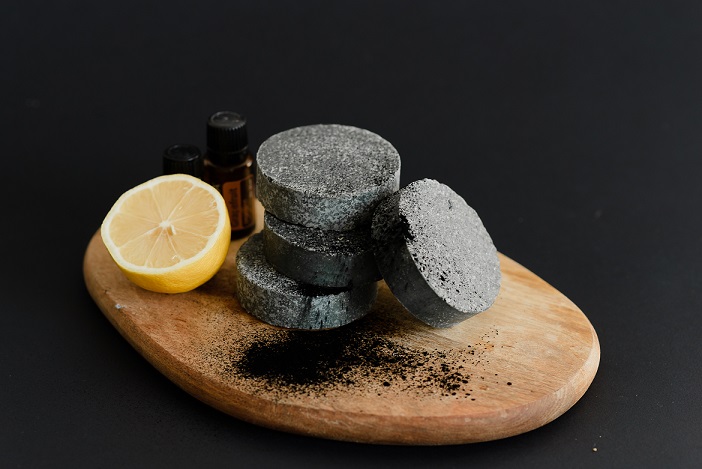
Charcoal Black Bath Bomb:
A popular trend today and probably not going anywhere tomorrow, is the charcoal bath bomb. This black bath bomb with activated charcoal, is what the discussion is for today. This particular type of bath bomb became iconic on Instagram a while back (heck, it even has it’s on IG page).
One of the first to make a black bath bomb was none other then LUSH, the “king” or “queen” of bath bomb products.
We find this is one of the more difficult bath bombs to DIY and to get just right. The activated charcoal is a cool thought, but in reality, you have to use quite a bit to get it to disperse and truly create a “black (not grey) bath”. Other ingredients can add to the ability for it to disperse, when used correctly. Charcoal is also not the easiest to work with for novice bath bomb makers.
Today’s Charcoal Trend:
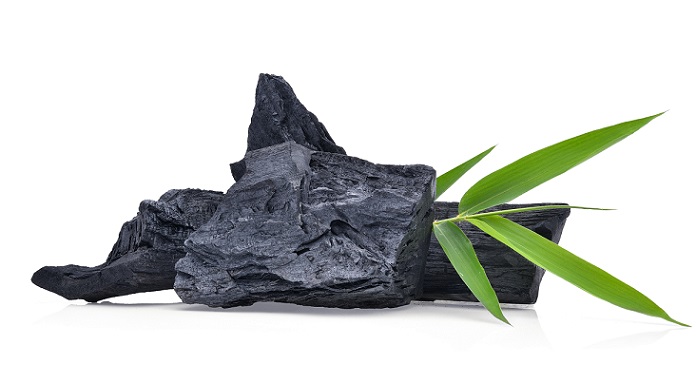
Activated charcoal is an ingredient we are seeing in many skin cleansers, face masks, and oral products today. According to Allure, activated charcoal adds an ability to absorb toxins and pollutants. Furthermore, (an interesting fact) it actually has been used in hospitals to help treat alcohol poisoning and drug overdoses because of absorption properties.
With seemingly everyone today trying to look younger, you can see why getting ride of toxins, excess oils in or on your skin, may be something everyone would flock too. The bottom line is, time will tell as to whether activated charcoal actually has the touted benefits when added to skin products.
However, what better way to test out the benefits of charcoal, then with a fun black bath bomb, right!
Safety and Process of Making Activated Charcoal Bath Bombs
Activated charcoal is recognized as safe for use in bath bombs, making it an interesting ingredient for these relaxing bath products. Let’s delve into the process and consider some alternatives as well.
Crafting with Activated Charcoal
- Learning Curve: As with any new crafting skill, creating bath bombs, especially with activated charcoal, may not be perfect on the first attempt. As you make more batches, you’ll pick up tips and tricks to achieve the desired consistency and results.
- Messiness Factor: Keep in mind that working with charcoal can be somewhat messy, and the results can vary.
Alternatives to Charcoal
- Diverse Colorants: Black bath bombs don’t necessarily have to be made with charcoal alone. You can explore other black colorants such as skin-safe black gel colorants, certain types of mica, and black oxide.
- Experimenting with Mixes: For a deeper black shade, you might consider combining black oxide with activated charcoal, although that could be an experiment for another time.
Guide to Making Black Bath Bombs with Activated Charcoal
Creating black bath bombs using activated charcoal is an engaging process. This method is not only natural but also ensures the bath bombs are safe and enjoyable for your bath time. Here’s a breakdown of the ingredients and equipment needed for this project.
Ingredients
Dry Components:
- Baking Soda: 2 Cups (250 grams)
- Citric Acid: 1.5 Cups (100 grams)
- Sodium Lauryl Sulfoacetate (SLSA): This ingredient creates the foam – 1/2 TBSP.
- Kaolin Clay: 1/8 TBSP
- Corn Starch: 1/4 TBSP
- Cream of Tartar: 1/2 TBSP
- Activated Charcoal Powder: 2 tsp.
Wet Components:
- Sweet Almond Oil: 1 TBSP.
- Polysorbate 80: 1% of the total weight of the mixture
- Fragrance or Essential Oils: 20 grams (options like sandalwood or rosemary)
Other:
- Witch Hazel: In a spray bottle for moisture control
Equipment
- Mixing Bowls: 2
- Measuring Spoons and Cups
- Whisk for thorough mixing
- Protective Gear: Mask, gloves, and eye cover for safety
- Bath Bomb Molds: Choose from round or skull molds for different shapes
Process Overview
While the list of ingredients and equipment may seem extensive, the process is straightforward once you organize everything. Mixing the dry and wet ingredients separately before combining them ensures consistency. The use of safety gear like masks and gloves is important when working with powders like activated charcoal. Achieving the perfect moisture balance with witch hazel is key to successful bath bomb formation.
Creating these bath bombs can be a fun and creative process, offering a satisfying end product that’s perfect for a relaxing bath experience.
Recipe Changes:
Before we make our charcoal bath bomb mixture, let’s focus on a few ingredients that we adjusted as far as the ratio’s because of the added charcoal, compared with our foaming or fizzing bath bombs.
Fine-Tuning the Bath Bomb Recipe for Enhanced Fizz and Dispersion
In crafting this specific bath bomb, particularly with activated charcoal, certain adjustments to the standard recipe have been made to optimize fizz, dispersion, and overall bath experience. Here’s a closer look at these modifications:
Citric Acid for Increased Fizz
- Fizz Enhancement: The goal is to create a more effervescent bath bomb. A higher fizz factor ensures better dispersion of activated charcoal in the bathwater, enhancing the visual and sensory experience.
Polysorbate 80 for Better Emulsification
- Increased Quantity: The amount of Polysorbate 80 has been increased in this recipe. This ingredient is key in emulsifying oils in the bathwater.
- Function in Bath Bombs: Commonly used with ingredients like mica powder, Polysorbate 80 prevents powders from sticking to the bathtub and clumping, allowing for smoother dispersion in water.
- Role with Activated Charcoal: It aids in evenly dispersing the activated charcoal and reduces its tendency to cling to the tub sides. However, it’s important to note that it doesn’t entirely eliminate the potential for a residual “ring around the tub.”
Adjusting Corn Starch
- Reduced Quantity: The amount of corn starch in this bath bomb recipe has been decreased.
- Reason for Reduction: Corn starch typically slows down the reaction between baking soda and citric acid. For this recipe, a quicker and stronger reaction is desired in the tub to enhance the fizzing effect.
- Interaction with SLSA: Ingredients like Sodium Lauryl Sulfoacetate (SLSA) can also slow down the reaction time. The adjusted corn starch amount helps to counterbalance this effect.
By making these specific adjustments, the bath bomb is tailored to provide a more dynamic and satisfying bath experience, with a focus on increased fizz and better ingredient dispersion, especially for the activated charcoal component.
Check out some other cool bath bombs:
Cupcake Bath Bombs Oatmeal Bath Bombs
Directions for Making Charcoal Bath Bombs
Creating charcoal bath bombs is a fun and rewarding DIY project. Here’s a step-by-step guide to making your own:
Step 1: Measure Ingredients
- Initial Preparation: Start by accurately measuring out all the dry and wet ingredients.
Step 2: Mix Dry Ingredients
- Combining Dry Components: In a bowl, mix the baking soda, citric acid, SLSA, corn starch, and kaolin clay. Ensure all ingredients are fine-grained to avoid lumps. Break up any lumps by rubbing the mixture between your hands.
Step 3: Mix Wet Ingredients
- Wet Ingredients Mixture: In a separate bowl, mix your wet ingredients – sweet almond oil, fragrance or essential oil, and polysorbate 80. Tip: Add the activated charcoal directly to the Polysorbate 80 for easier blending.
Step 4: Combine Wet and Dry
- Mixing Together: Gradually combine the wet ingredients with the dry, mixing thoroughly with gloved hands or using a stand mixer.
Step 5: Determine Charcoal Quantity
- Charcoal Amount: Use approximately 2 tsp of activated charcoal for standard batches, adjusting based on batch size. Tip: Activated charcoal can be messy and airborne, so handle it gently with a mask and gloves.
Step 6: Address Dryness with Witch Hazel
- Moistening the Mixture: If the mixture is too dry to mold, lightly spritz it with witch hazel, being careful not to overdo it.
Step 7: Test Consistency
- Consistency Check: Perform the “drop test” – squeeze a handful of the mixture and drop it from a height. If it holds together, it’s ready for molding.
Step 8: Mold the Bath Bombs
- Molding Process: Overfill each side of your mold, press together firmly for 5-10 seconds without twisting, then gently tap and remove the bath bomb.
Step 9: Drying Time
- Drying Phase: Allow the bath bombs to dry for 24-48 hours in a low-humidity environment, preferably on a soft surface like egg foam.
Caution:
- Coloring Considerations: Be cautious with the use of food coloring, especially darker pigments like black. Large amounts can leave stains or rings in the tub, even with the use of polysorbate 80.
By following these steps, you can create your own charcoal bath bombs that are perfect for a relaxing and detoxifying bath experience. Remember to handle ingredients carefully and enjoy the process of crafting these indulgent bath treats.
You can also head over to the Soap Queen, where they have a cool experiment with activated charcoal vs. liquid black iron oxide.
Final Thoughts!
Thanks for reading, we hope you enjoy your black bath bombs with activated charcoal.
As always, we thank you for coming and hope to see you again soon. Be sure to share our posts on social media and other outlets that you enjoy sharing fun information!
References:
