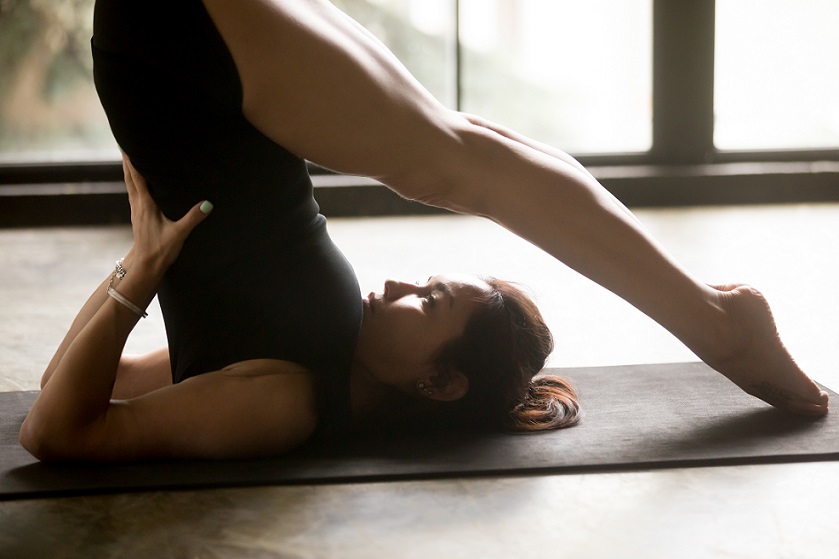
Plow Yoga Pose:
Oftentimes, Plow yoga pose is completed near the end of a yoga routine. However, it maintains a classification of an intermediate level asana. Like it’s name has multiple variations (plow or plough), it’s an asana popular for it’s ability to calm the mind and body, or providing a sense of deep rejuvenation, for both.
| Basics | |
|---|---|
| Name | Plow (Plough) Pose |
| Sanskrit | Halasana |
| Pronunciation | HAH-LAHS-ANNA |
| Pose Level | Intermediate |
Certainly, here’s the step-by-step guide presented in a table format:
| Step | Instructions |
|---|---|
| 1 | Begin by lying on the floor or a yoga mat with your arms positioned alongside your body, elbows close to your sides, and palms facing downward. |
| 2 | Draw your knees toward your chest. |
| 3 | Apply gentle pressure with your hands to press into the mat and gradually lift your hips off the mat, moving them toward your head while keeping your knees bent. |
| 4 | Your knees should be slightly past your forehead at this point. |
| 5 | Place your hands on your lower back for support in preparation for the next step. Your upper arms should remain on the mat, while your hands and forearms are off the mat. |
| 6 | Start walking your hands downward, moving toward your upper back, and pressing your torso higher into the air. |
| 7 | Begin to straighten your legs, pointing your toes toward the ceiling. |
| 8 | After holding this position for a few seconds or a few breaths, slowly lower your feet toward the floor while trying to keep your legs straight. As you descend, aim to have your toes pointing toward your head and touch the mat with your toes. |
| 9 | Interlace your fingers behind your back, squeezing your shoulder blades together. Alternatively, you can reach for your big toes with your hands. |
| 10 | Take 4-10 deep breath cycles while holding the pose. |
| 11 | To release, bend your knees and roll your spine back down to the mat. |
Anatomy:
- Lower back
- Middle back
- Upper back
- Hips
- Hamstrings
- Gluteus
Pose Modifications:
Use a folded blanket under the neck for support. Additionally, if unable to bring your toes down to the mat, your may bend your knees slightly. You can maintain support as well on the lower back if needed.
Related Article: Improve & Complete Your Yoga Routine: The Essential Yoga Props
Contraindications:
It’s essential to exercise caution with this pose, as it is contraindicated in several situations:
- Recent shoulder injury or pain.
- Recent back or neck injury or pain.
- Pregnancy.
- Migraines or headaches.
- High blood pressure.
- Sciatica.
If you fall into any of these categories, it’s advisable to avoid or modify this pose and seek guidance from a qualified yoga instructor or healthcare professional. Your safety and well-being should always come first during your yoga practice.
Poses Commonly Transitioned To:
Corpse Pose (Savasana), Legs Up The Wall Pose (Viparita Karani)
Poses Commonly Transitioned From:
Cat Cow (Bitilasana Marjaryasana), Cobra Pose (Bhujangasana), Bridge Pose (Setu Bandha Sarvangasana), Shoulderstand (Sarvangasana)